6.3 KiB
Miryoku ZMK Quickstart Guide 
Miryoku ZMK can be personalised, built, downloaded, and flashed onto your keyboard in a few minutes without installing any software or editing any files.
Initial Setup
- Create a GitHub account.
- Login to GitHub.
- Visit https://github.com/manna-harbour/miryoku_zmk.
- Press the
Forkbutton in the top right.

- Visit https://github.com/?q=miryoku_zmk.
- Select your fork of
miryoku_zmkfrom the list on the left. - Select the
Actionstab.

- Press the
I understand my workflows, go ahead and enable thembutton.
Build
Start here to build new firmware after completing the initial setup.
- Visit https://github.com/?q=miryoku_zmk.
- Select your fork of
miryoku_zmkfrom the list on the left. - Press the
Fetch upstreambutton in the top right.
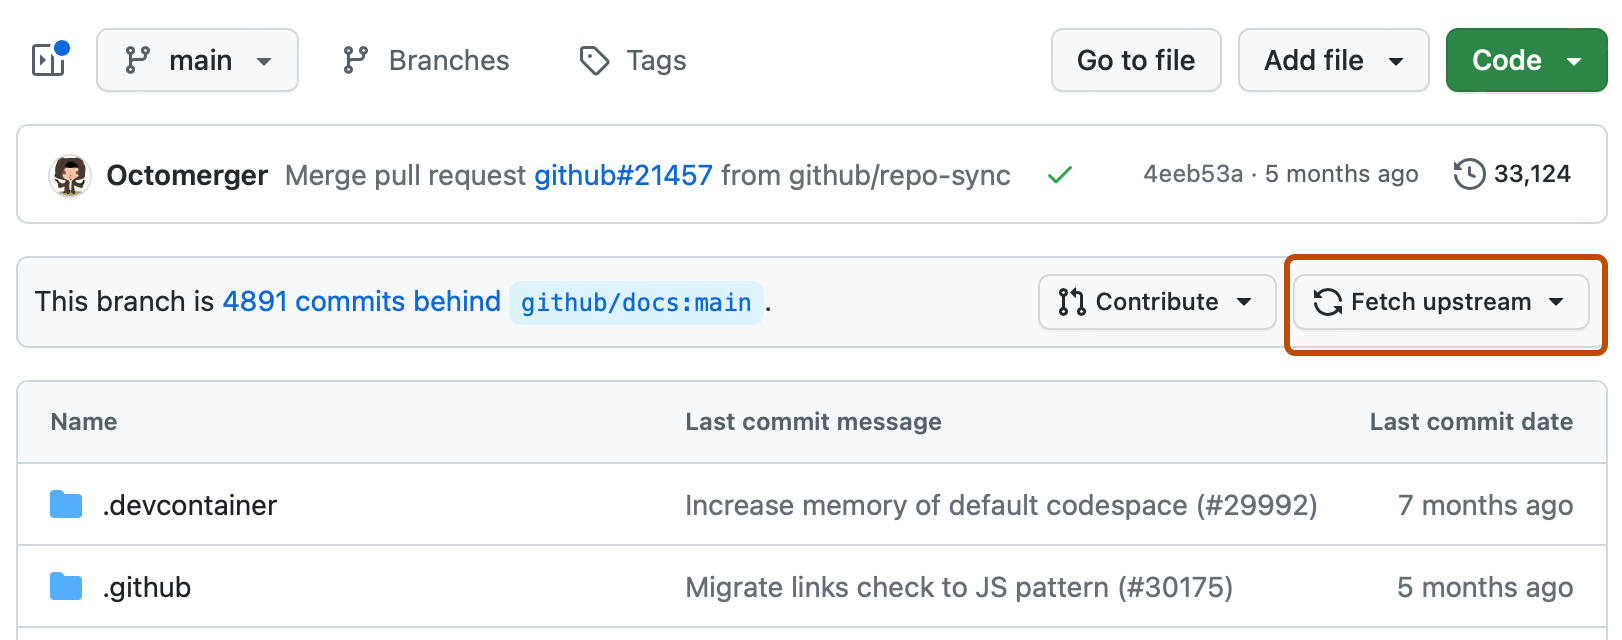
- Press the
Fetch and mergebutton in the popup if it is enabled.

- Select the
Actionstab.
- Select
Build Inputsfrom theWorkflowslist on the left. - Press the
Run workflowbutton on the right.

- Fill out the fields in the popup as described below.
- Press the
Run workflowbutton at the bottom of the popup.

- Wait for the workflow run to complete.
Fields
Board
For keyboards with a separate controller, enter the controller name, e.g. bluemicro840_v1, nice_nano, nice_nano_v2, nrfmicro_13. See here for a list of all supported controllers.
For keyboards with an integrated controller, enter the keyboard name, e.g. ahokore, ble_chiffre, ferris_rev02, zaphod. For split keyboards with an integrated controller on each side, enter both keyboard side names separated by a comma, e.g. corne-ish_zen_left,corne-ish_zen_right. See here for a list of all supported keyboards with an integrated controller.
Shield
For keyboards with a separate controller, enter the keyboard name, e.g. absolem, bat43, eek, osprette. For split keyboards with a separate controller on each side, enter both keyboard side names separated by a comma, e.g. corne_left,corne_right, cradio_left,cradio_right, kyria_left,kyria_right, tbkmini_left,tbkmini_right. See here for a list of all supported keyboards with separate controllers.
For keyboards with an integrated controller, leave as default.
Miryoku Alphas
Select an alternative alphas layout, e.g. colemak, dvorak, halmak, qwerty, See here for a list of all supported alphas. For Colemak Mod-DH, leave as default.
Miryoku Nav
Select an alternative Nav layout, e.g. invertedt, vi. See here for details. For home position line nav, leave as default.
Miryoku Clipboard
Select an alternative clipboard type, e.g. mac, win. See here for details. For CUA bindings, leave as default.
Miryoku Layers
Select an alternative layers layout, e.g. flip. See here for details. For right hand Nav, leave as default.
Miryoku Mapping
Select an alternative mapping, e.g. extended_thumbs, pinkie_stagger. See here for details. For the default mapping, leave as default.
Kconfig
Set keyboard configuration options, e.g. CONFIG_ZMK_SLEEP=y, CONFIG_ZMK_DISPLAY=y, CONFIG_BT_CTLR_TX_PWR_PLUS_8=y. See here for details. For the default configuration, leave as default.
Download
Start here to download previously built firmware.
- Visit https://github.com/?q=miryoku_zmk.
- Select your fork of
miryoku_zmkfrom the list on the left. - Select the
Actionstab.
- Select the workflow run from the list.

- Select the artifact at the bottom.

- Wait for the download to complete.
- Unzip the downloaded zip file.
Flash
Start here to flash previously downloaded firmware.
The downloaded zip will contain a uf2 firmware file. For split keyboards the zip will contain separate firmware files for the left and right sides, and the following steps should be performed for each side.
- Connect the keyboard to the computer with a USB cable.
- Double tap the reset button rapidly (two presses within half a second). The keyboard will appear to the computer as a USB mass storage device.
- Copy the firmware file to the device. The keyboard will reset and the device will be removed.
